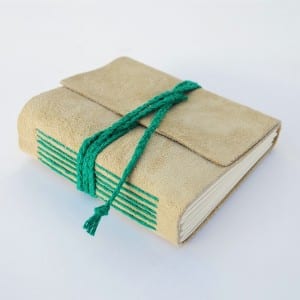
 As you all very well know, I just love finding new and interesting craft and DIY projects that are both simple and practical. I keep a bin of all of my leftover materials, and every once in a while I like to rummage through those materials to see if there is anything that can be made out of them. The last time I looked in the bin, I came across some scraps of leather that I had previously used in making handbags when I realized the scraps could be easily made into a cover for a nice hand-bound book.
I don’t know about the rest of you, but I used to always carry around a small Moleskine notebook to write down whatever random thought happened to pop into my head. I have a whole trunk full of those notebooks somewhere, and I have missed having them with me wherever I go. Instead of just going out and buying a notebook and a leather cover, I thought it would be nice to try my hand and making my own. The project did not take long and it turned out wonderfully, so I will try to explain how you can make one too.
First you will need to pick out the paper that you want to use and cut it down to 8 ½ inches by 5 ½ inches. This will keep the notebook itself small and convenient so you can keep it in a purse or even a pocket. Fold the paper in half and then punch two holes along the crease so the paper can be threaded through the leather later on in the project. How many pages you will want is up to you, but four sheets of paper folded in half yields 16 pages and keeps the book real thin.
Next you will have to cut the leather cover to size, so measure it out to 5.5 inches by 11 inches. Line up the paper with the cover and find the holes in the paper through the leather and make a mark so you can punch holes in the leather too. Run some cording through the inside of the book and then out again, and tie it up with you most decorative knot. There should be some leather that sticks out a bit on one end, and this will be used as a flap for the cover. You can use another leather strip to tie the book together decoratively, or you can attach a button to keep the cover in place. Those touches are completely up to you.